Red Tower Puzzle
Five nearby puzzles feed the Red Tower. Its key opens the Map Room — a foldable map, a compass and a full island diorama.
To unlock the Map Room in Big Walk, solve the five puzzles clustered around the Red Tower, carry all five puzzle rewards up the tower, deposit them at the top terminal, then file the released key at five contraptions on the way back down and open the blue tunnel with red stairs next to the starting area. The whole chain takes a group of two about 30–45 minutes. Inside the Map Room you pick up the foldable map and the compass — the two navigation items the game otherwise never gives you — plus the Big View trophy for opening the door.
Here is the full walkthrough, step by step, with screenshots for every stage.
What You Need Before Starting
- At least 2 players. Every one of the five puzzles is built for two people (more players is fine, nothing here requires more than two).
- A pair of walkie-talkies, if you have found them — the Green Button Room and the Mountain Overlook puzzle both depend on clear callouts between separated players.
- Binoculars, if you have a pair — useful at the overlook puzzle and for spotting the five puzzle structures from the tower top.
- No other unlocks required. The Red Tower is available immediately from the starting area; you do not need any other tower, key or tool to begin.
Where Is the Red Tower?
Leave the starting area, cross the red bridge and pass through the gym. The path leading directly opposite the gym goes uphill to the Red Tower — you will recognize it by its shape: an upside-down cone on legs.
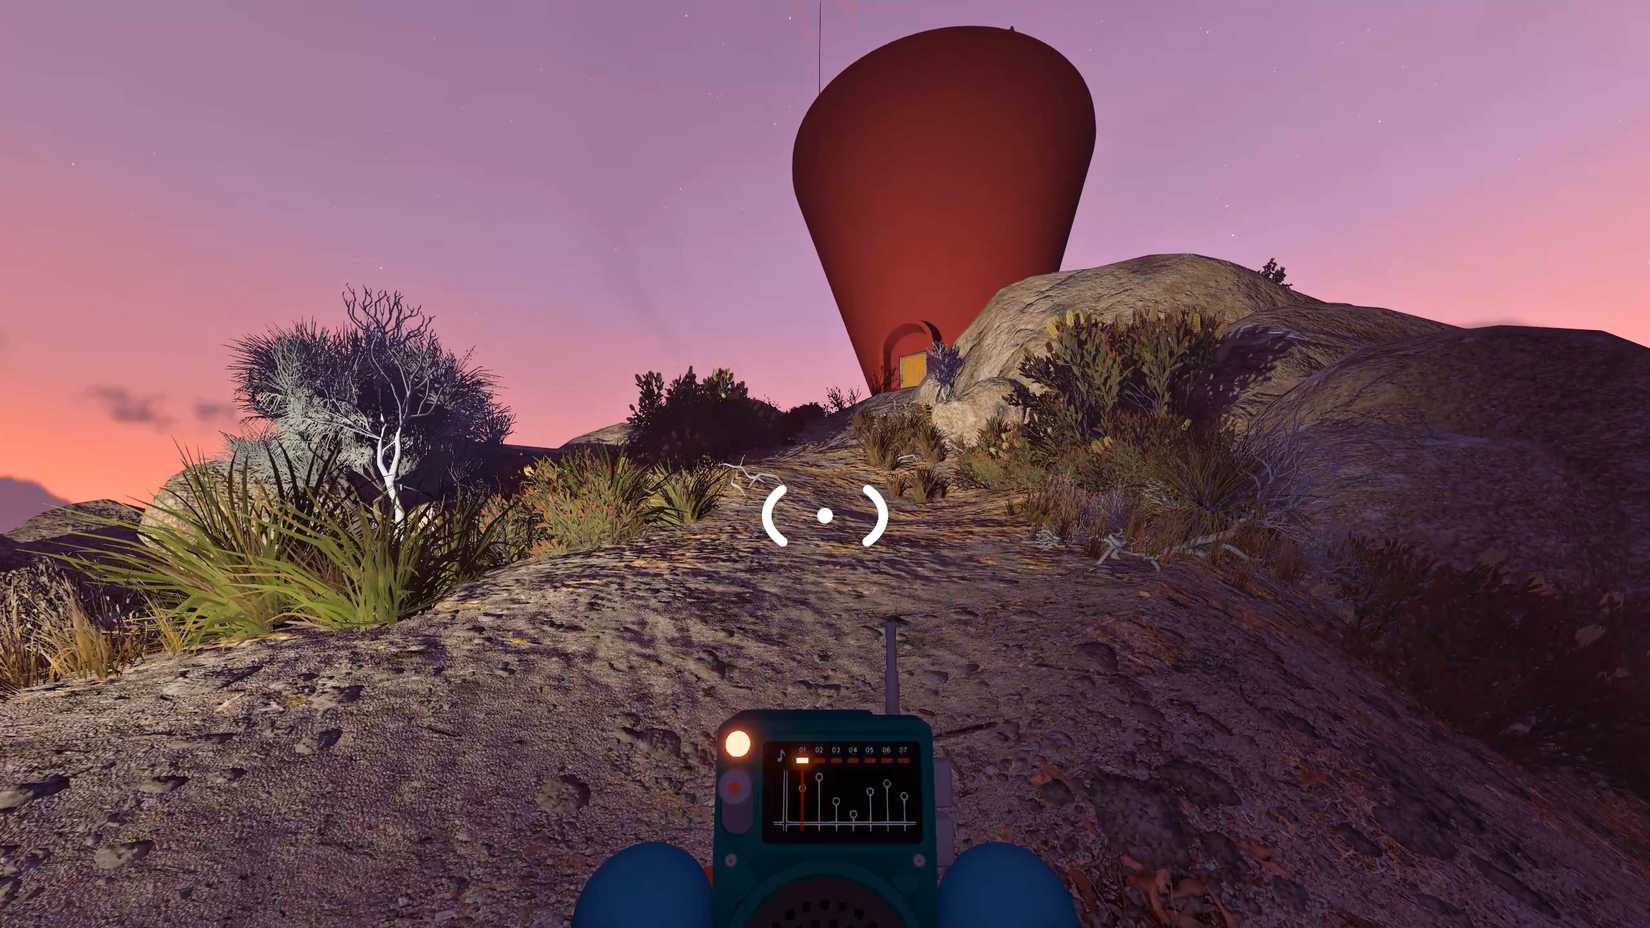
The game nudges you here early for a reason: this is the tower whose reward (the map and compass) makes every later part of the game easier. For the full island picture, see our Big Walk map guide.
The Five Puzzles at a Glance
All five puzzle structures sit between the Red Tower and the shoreline, close enough that you can see every one of them from the top of the tower. Each pays out one puzzle reward — a small red collectible (PC Gamer's writer calls them "nubbins"; players also say red beans or gourds). The tower terminal wants all five.
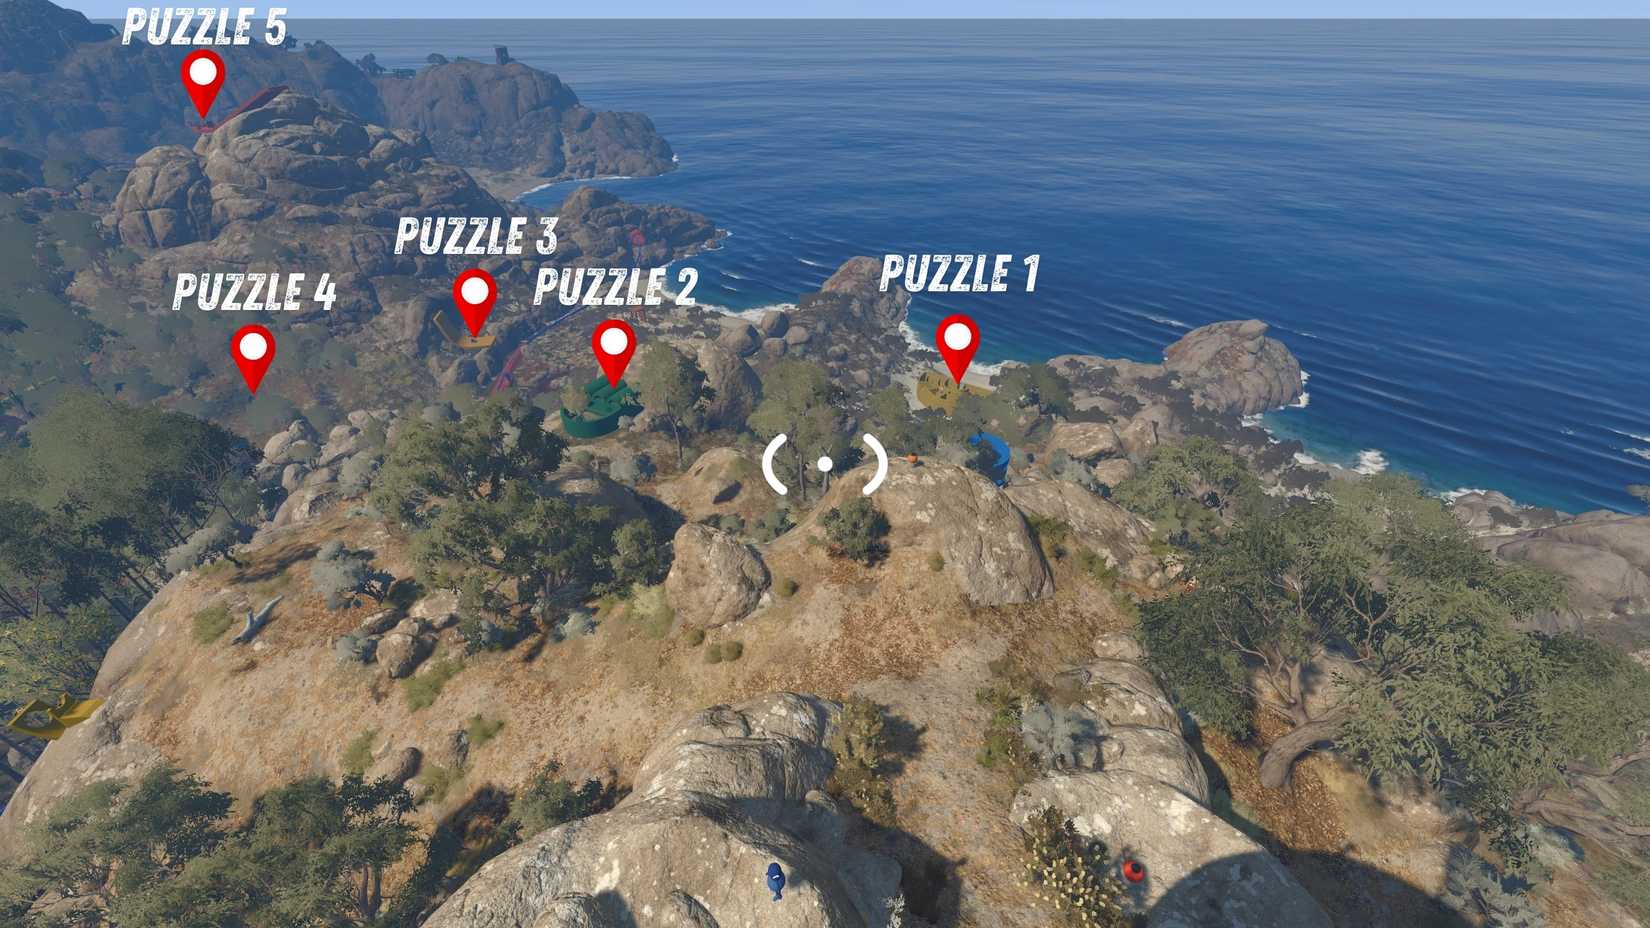
- The Yellow Maze
- The Green Button Room
- The Train Station Timer Cannon
- The Basketball Court
- The Mountain Overlook Gesture puzzle
The solutions below follow GameRant's two-player walkthrough (August 4, 2026); PC Gamer's coverage independently confirms the same five-puzzle structure and the reward chain.
Puzzle 1: The Yellow Maze
Where: the yellow maze structure nearest the tower, one of the five visible toward the shoreline.
Step by step:
- Split up at the entrance — one player takes the left path, the other the right. The paths run parallel and connect through holes in the dividing wall.
- The left-path player picks up the wind-up timer.
- Pass the timer through a hole to the right-path player.
- The right-path player runs it to the green pot and drops it in before it winds down.
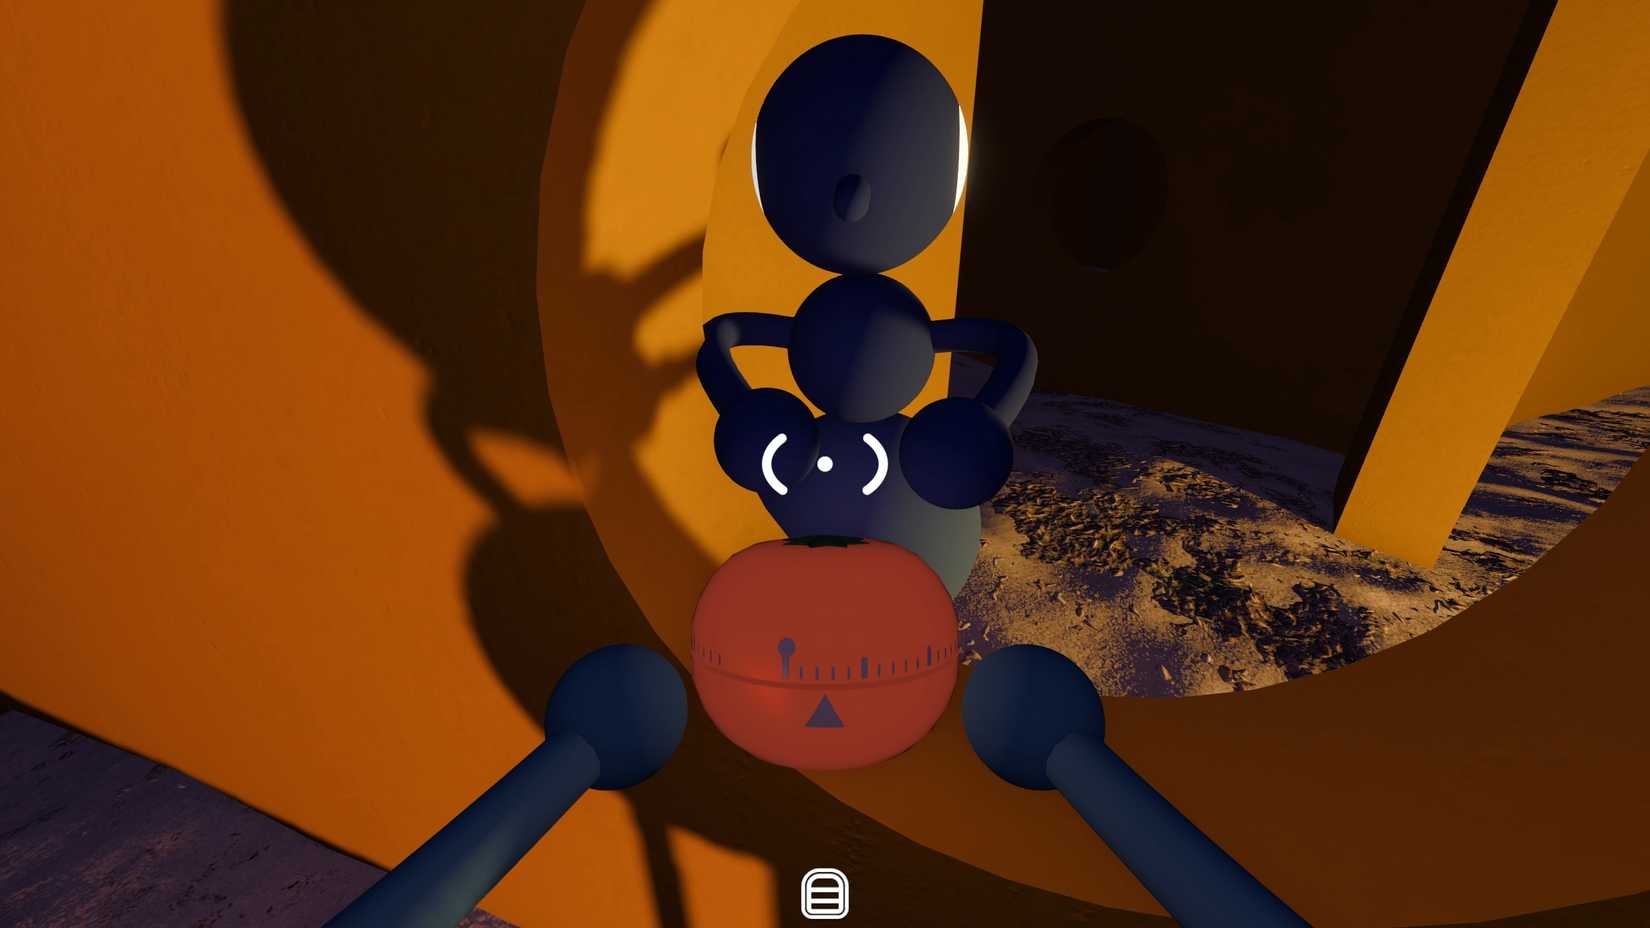
Common mistake: fumbling the handover while the timer ticks. Agree on which hole to use before anyone picks up the timer.
Puzzle 2: The Green Button Room
Where: the green dome building on the coastline.
Step by step:
- One player steps inside the room and closes the door.
- The console inside lights up one button.
- The inside player calls out exactly which button — the outside player cannot see anything inside.
- The outside player presses the matching button on the outside console.
- Repeat for each new prompt until the puzzle reward drops.
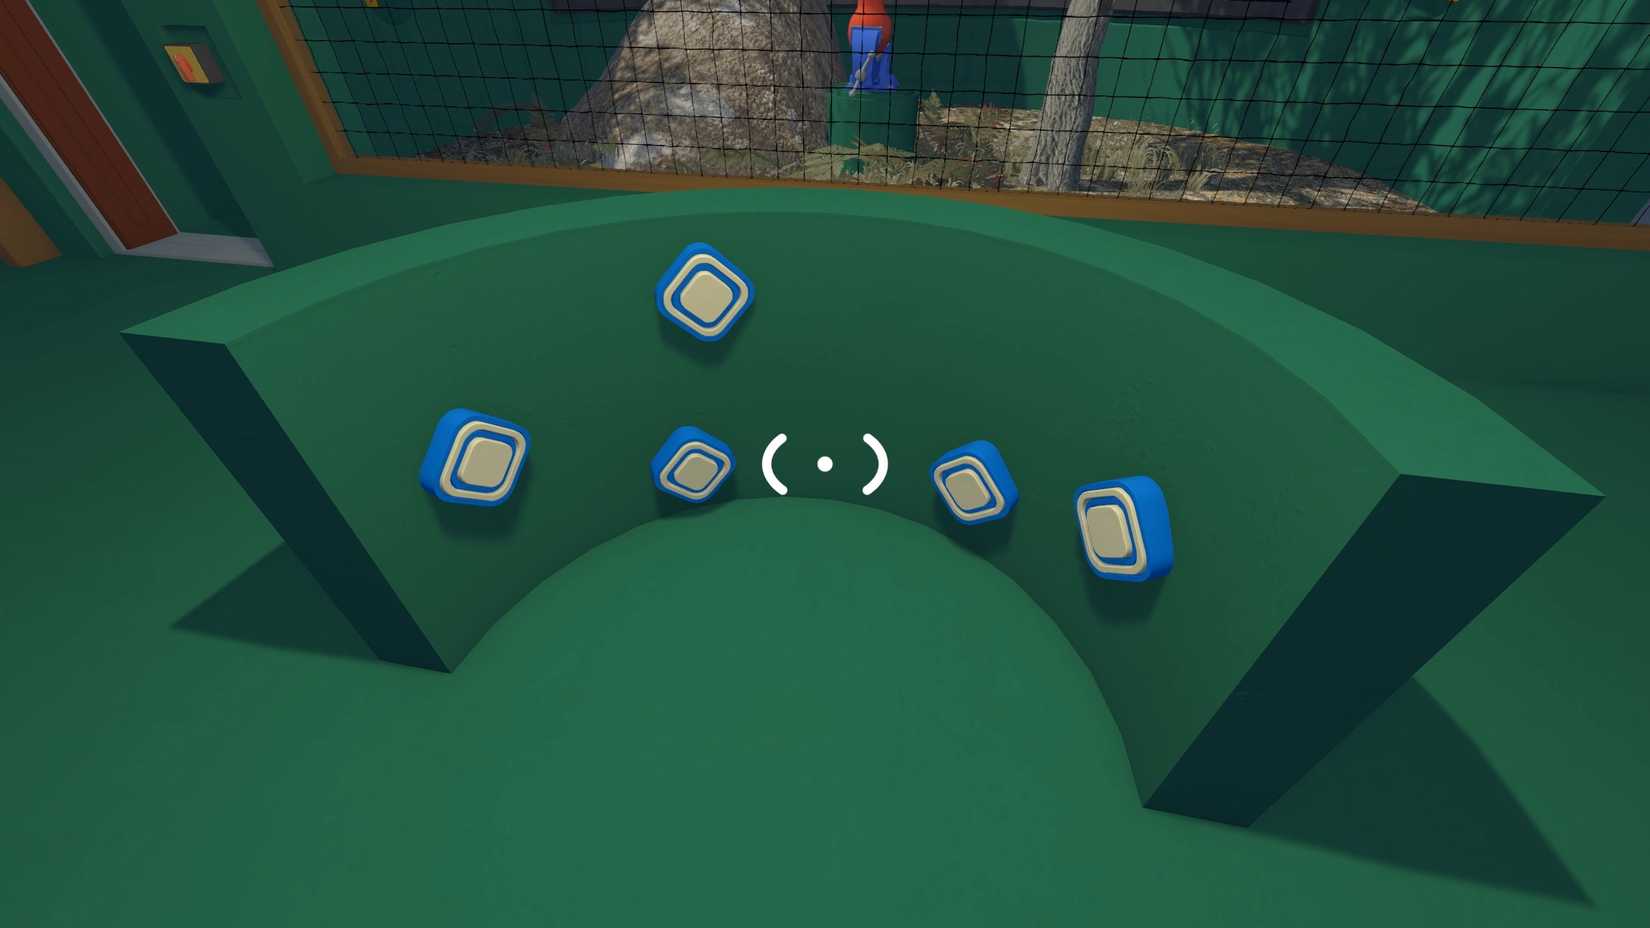
Common mistake: vague callouts ("the one on the left-ish?"). Name the button precisely, and use a walkie-talkie — the closed door eats proximity voice.
Puzzle 3: The Train Station Timer Cannon
Where: the train station — the same station the wider game later unlocks for travel.
Step by step:
- One player stays on the yellow platform and loads the wind-up timer into the cannon.
- Fire — the cannon launches the timer a long way across the area.
- The second player chases the timer down before it ticks to zero.
- Climb the rock opposite the yellow platform and throw the timer back over.
- The first player slots it into the green pot in time.
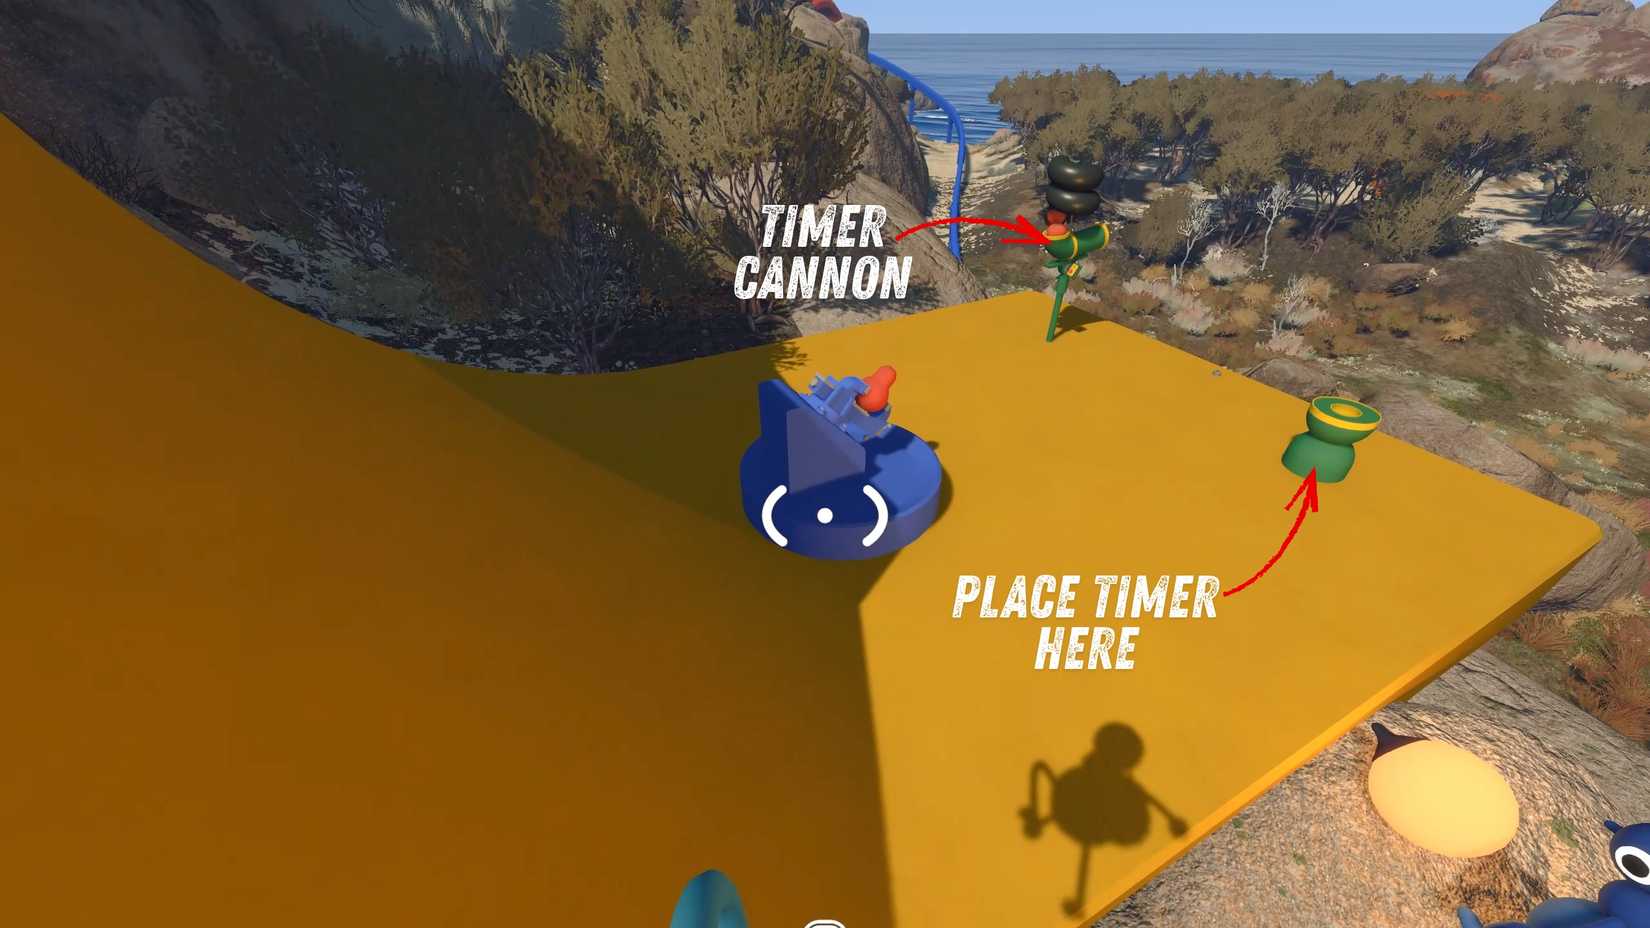
Common mistake: watching the cannon fire before starting to run. Check where it is aiming as it fires and move immediately — the return throw is much easier if you are already on the rock.
Puzzle 4: The Basketball Court
Where: the basketball court among the five shoreline locations.
Step by step:
- Grab the light-up ball from the ground.
- Throw it through the basket.
- Keep scoring until every light on the backboard turns green — then the puzzle reward is released.
This is the relaxed one of the five — no split-up, no timer, no callouts. Any number of players can take turns shooting.
Puzzle 5: The Mountain Overlook Gesture Puzzle
Where: the mountain overlook, the highest of the five locations. Bring binoculars if you have them.
Step by step:
- One player stays at the overlook and looks through the telescopes at the five distant platforms.
- The other player travels to each platform in turn.
- The overlook player reads out the gesture shown for that platform.
- The traveling player builds the gesture from button combinations — for example left arm up, right arm up, crouch — and slots the matching gesture card into the rack on the platform.
- Repeat for all five platforms.
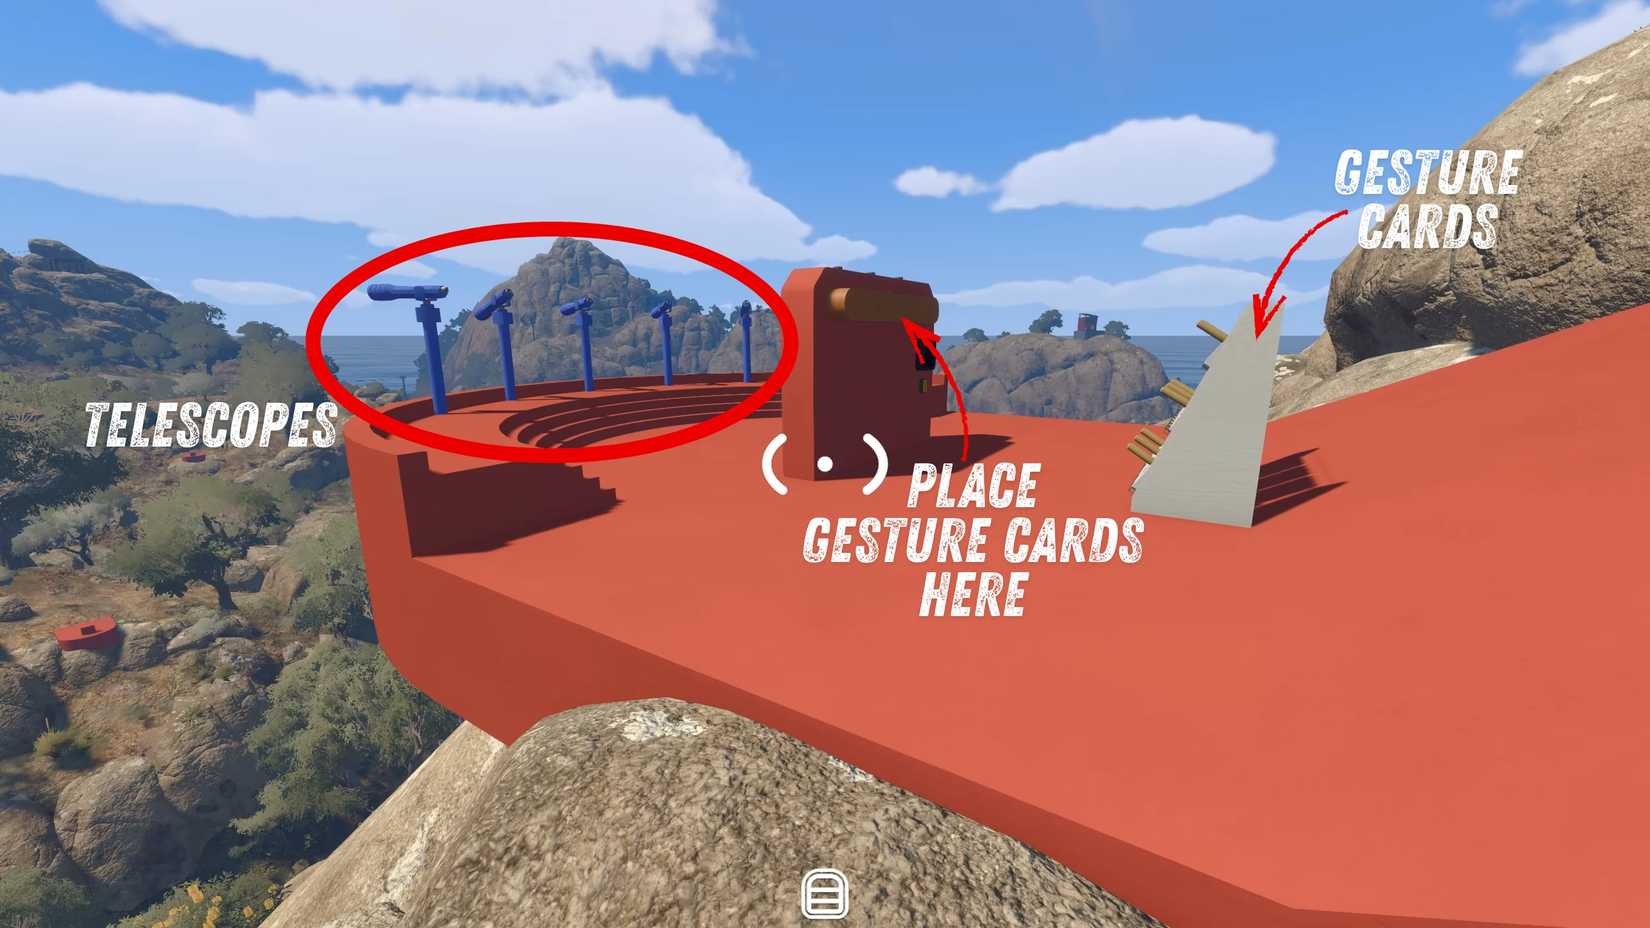
Common mistake: traveling to the wrong platform. Confirm which platform the telescope is pointing at before you start walking — binoculars help the traveler double-check from a distance. GameRant flags this as the slowest of the five puzzles, so don't rush the callouts.
Step 6: Deposit the Five Rewards at the Tower Terminal
Climb to the top of the Red Tower. The terminal there has five slots — insert all five puzzle rewards.
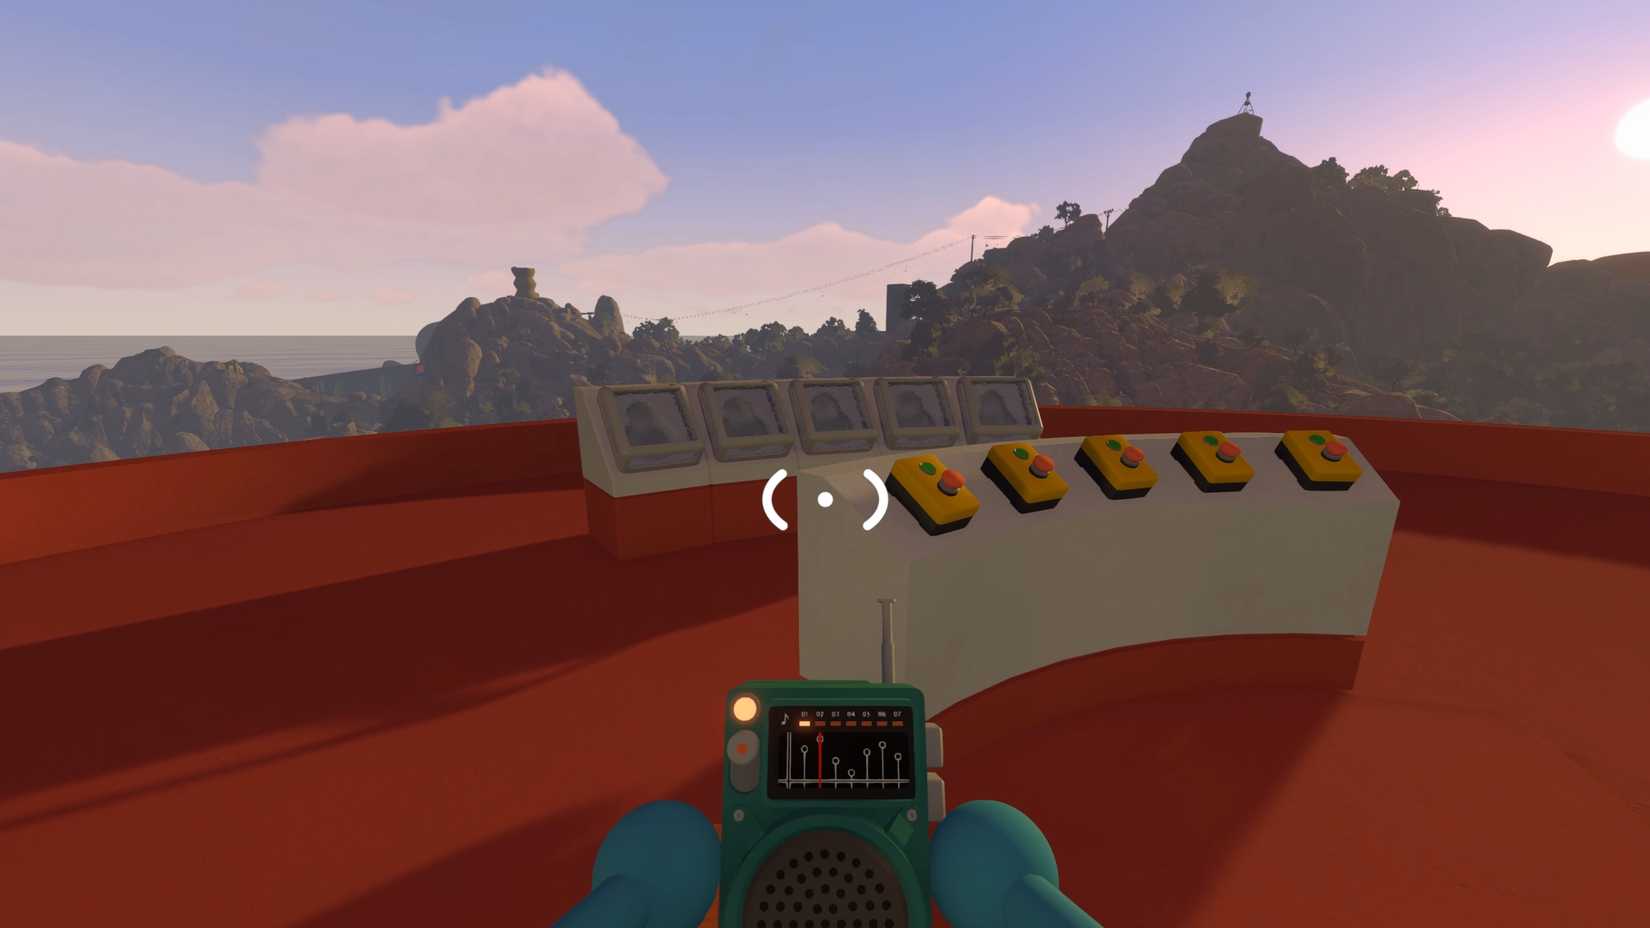
The terminal releases the key. You are not done yet — the key comes out unshaped and must be filed first.
Step 7: File the Key (Five Filing Stations)
- Directly in front of the Red Tower entrance is a small slot — insert the key to start filing/shaving it.
- Follow the pathway back down toward the gym area. Filing contraptions are lined up along it — insert the key at each of the remaining four.
- The last contraption outputs the properly shaped key.
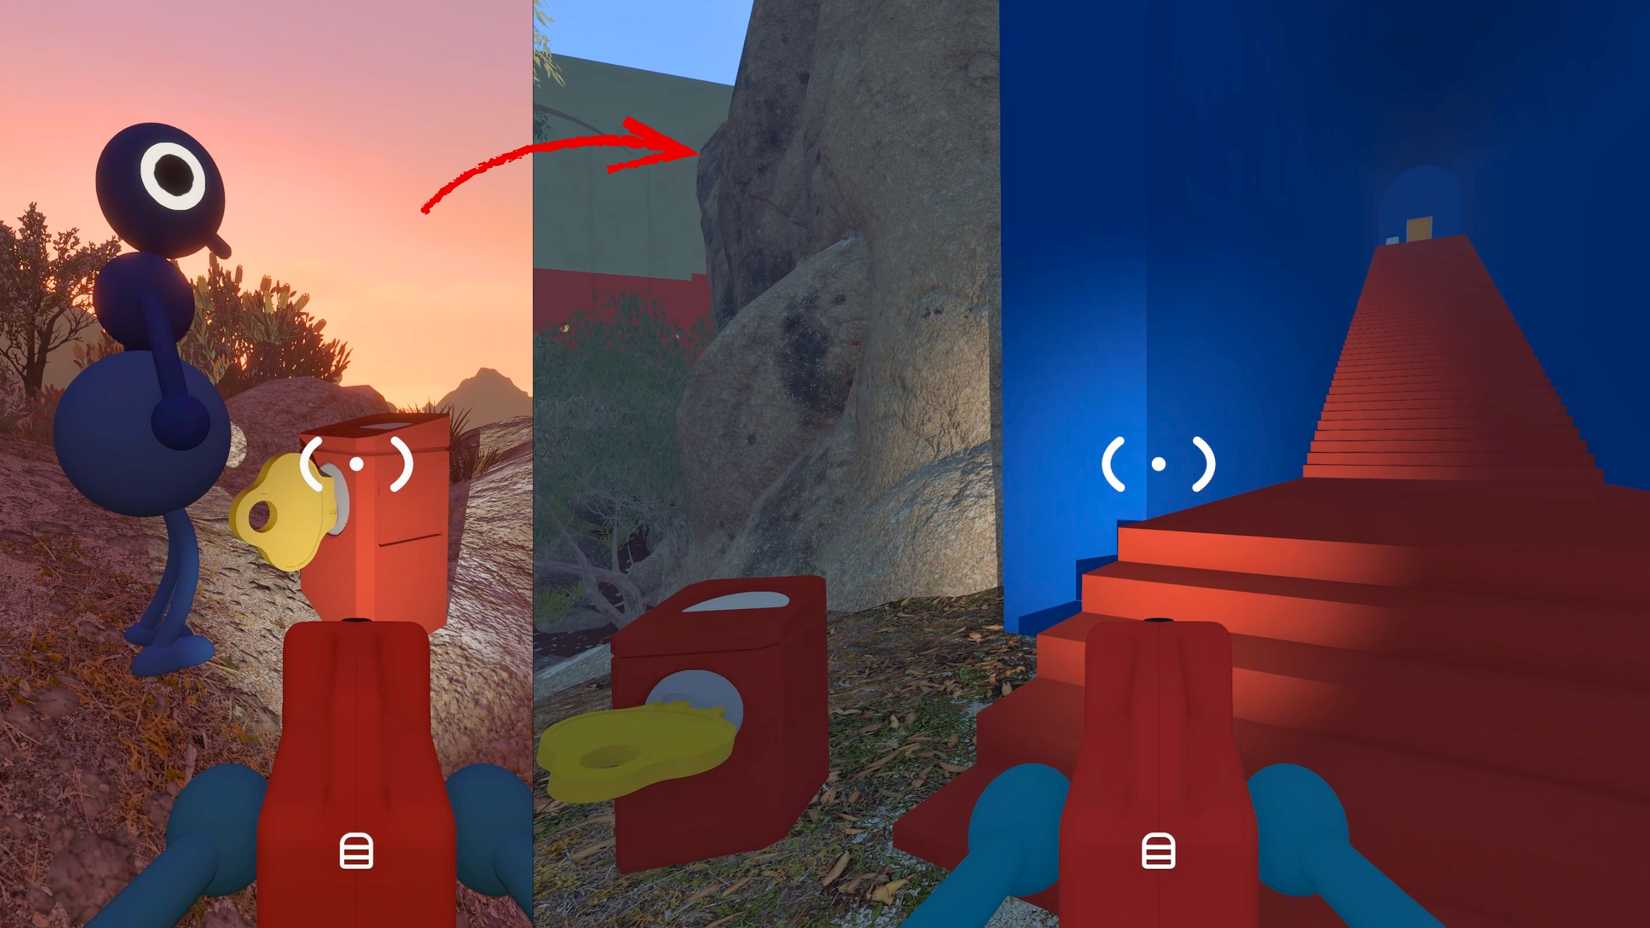
The whole sequence is one straight walk from tower to gym — you cannot miss the contraptions, they only work with the Red Tower key.
Step 8: Open the Map Room
Take the finished key to the terminal at the top of the blue tunnel with red stairs — the tunnel next to the starting hub. Insert the key, the door unlocks, and stepping inside the Map Room pops the Big View achievement/trophy.
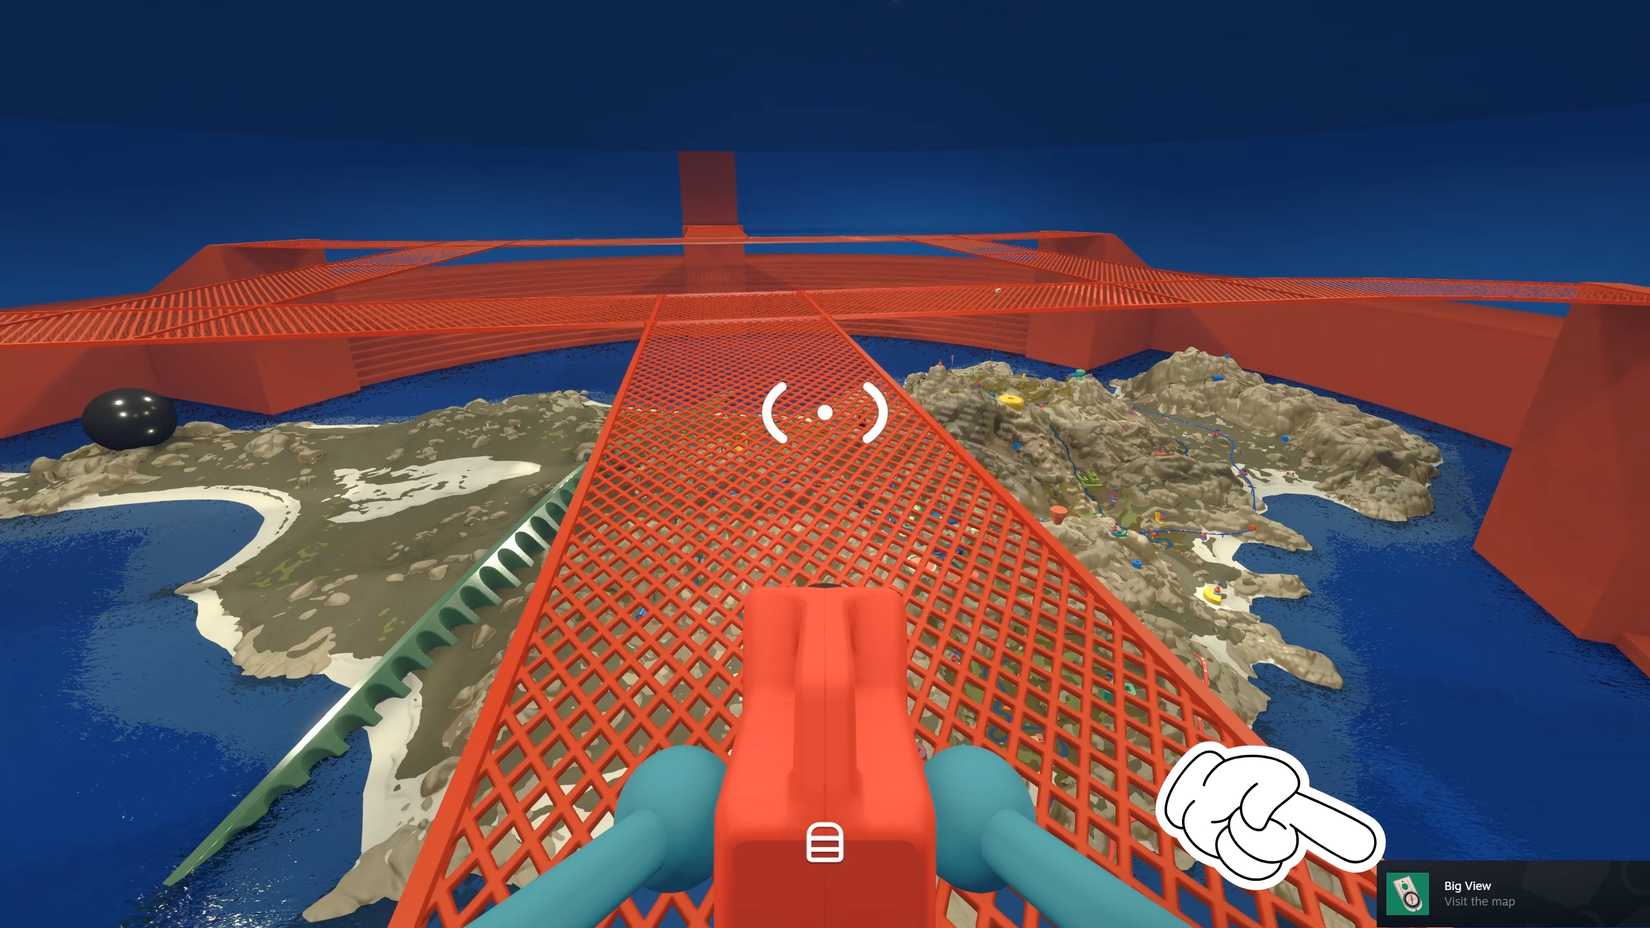
(GameRant places the room behind the blue-tunnel-with-red-stairs door; PC Gamer describes it as "right next to the starting hub" — same door, two ways of describing the location.)
What You Get: Map, Compass and the Island Diorama
- The foldable map — on the bench in the Map Room. Carryable. Shows the island's numbered coordinate grid, the same grid the 4166 1899 number puzzle is built on.
- The compass — on the same bench. Also carryable; use it to orient the map in the field.
- The island diorama — a full-scale model of the whole map on the room's floor, with flags marking everything your group has already completed. It doubles as a planning table.
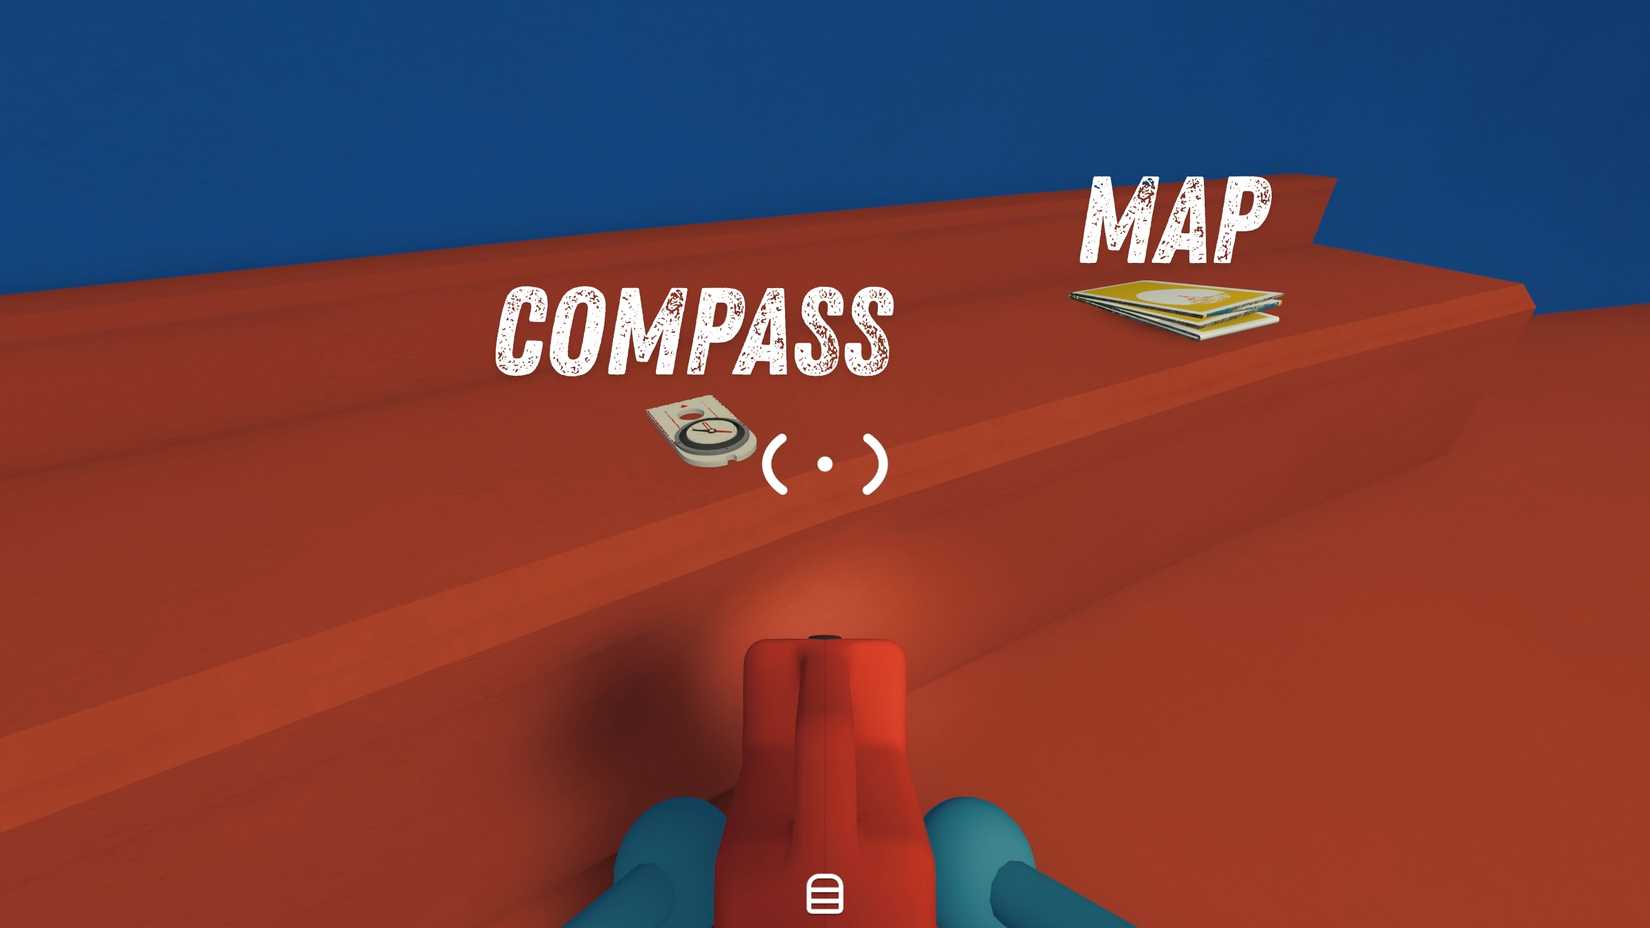
Big Walk has no map screen and no quest markers — until you own these two items, your group navigates by landmark and memory. This is also why the 4166 1899 coordinates puzzle is effectively locked before the Red Tower and routine after it: the map is one of only two items that can decode those numbers (the GPS near the green tower is the other).
Why Do the Red Tower First?
To be clear: the game does not require it. Towers can be done in almost any order — this is advice, not a gate:
- It is next to the starting area, with five early-game-difficulty puzzles.
- The map and compass compound over the whole campaign — every later puzzle hunt benefits from knowing where you are.
- PC Gamer's number-puzzle walkthrough makes the same point from the other side: groups that reach 4166 1899 before finishing the Red Tower simply cannot solve it yet.
If you are planning your route around the island, our all puzzles overview explains how the other towers' reward chains work, and the tools and items guide covers where walkie-talkies and binoculars come from.
FAQ
Where is the Red Tower in Big Walk?
Directly opposite the gym you pass through after the starting area — take the path uphill. It is the tower shaped like an upside-down cone, just past the red bridge.
How many puzzles does the Red Tower need?
Five nearby puzzles: the Yellow Maze, the Green Button Room, the Train Station Timer Cannon, the Basketball Court, and the Mountain Overlook Gesture puzzle. All five are visible from the tower top toward the shoreline.
What does the Red Tower unlock?
The Map Room (a full island diorama with completion flags), the foldable map, the compass, and the Big View achievement/trophy.
How do you file the Red Tower key?
Insert the key into the slot in front of the tower entrance, then at each of the four more filing contraptions lined up along the path back toward the gym. The finished key opens the terminal at the top of the blue tunnel with red stairs.
How do you get the map in Big Walk?
Complete the Red Tower — five puzzles, five rewards deposited at the top terminal, key filed — and unlock its Map Room. The foldable map is on the bench inside, next to the compass.
Where do you get the compass in Big Walk?
On the same bench as the foldable map, inside the Red Tower's Map Room.
What are the five red items for?
Each is a puzzle reward from one of the five Red Tower puzzles. The tower's top terminal takes all five and releases the key.
Can you do the Red Tower solo?
No — Big Walk has no solo mode, and each of the five puzzles needs a second player. See our can you play Big Walk solo explainer.
Do you need the map for the 4166 1899 puzzle?
Not strictly — the GPS near the green tower also solves it — but the map is the earlier, easier route.
Sources
- GameRant — Big Walk Red Tower Solution & Map Location (Big View Trophy) by Ayyoun Ali, August 4, 2026 — all five puzzle solutions, key filing, Map Room location. Walkthrough screenshots above are from this article, used with attribution.
- PC Gamer — Big Walk: So, what's the deal with that number puzzle? by Christopher Livingston, August 8, 2026 — independent confirmation of the five-reward structure and the map/GPS relationship.
- Big Walk official site — bigwalk.game (co-op design background).
RELATED BIG WALK TOPICS
These related pages complete the picture:
4166 1899 Puzzle
4166 and 1899 are not a code — they are coordinates pointing to a hidden button. Solve it with the map or the GPS.
GID-03Map
An open-world island of brightly colored monuments, puzzle structures and towers — no map screen or quest markers.
GID-02All Puzzles
Solve puzzles for red beans and gourds, deposit them in towers for keys, and unlock new areas like the train and chair lift.